반응형
dependencies 에 다음 추가. (이미 있을수도)
implementation 'com.google.android.material:material:1.8.0'
테스트 해볼 새로운 Empty Activity 생성
Layout 파일에서 ConstraintLayout 을 LinearLayout 으로 변경
(이 작업은 필수는 아닙니다. 위에는 pager, 아래는 tabLayout 만 배치하면 됩니다.)

root layout 에 android:orientation="vertical" 을 추가합니다.
Layout 은 아래와 같은 코드입니다.
<?xml version="1.0" encoding="utf-8"?>
<LinearLayout xmlns:android="http://schemas.android.com/apk/res/android"
    xmlns:app="http://schemas.android.com/apk/res-auto"
    xmlns:tools="http://schemas.android.com/tools"
    android:layout_width="match_parent"
    android:layout_height="match_parent"
    android:orientation="vertical"
    tools:context=".BottomNavTestActivity">

    <FrameLayout
        android:id="@+id/bottom_nav_frame_layout"
        android:layout_width="match_parent"
        android:layout_height="0dp"
        android:layout_weight="1">
    </FrameLayout>

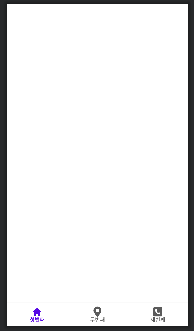
    <com.google.android.material.bottomnavigation.BottomNavigationView
        android:id="@+id/bottom_nav_bottom_nav_view"
        android:layout_width="match_parent"
        android:layout_height="52dp"
        app:menu="@menu/bottom_nav_menu"
        />
</LinearLayout>
FrameLayout 에는 Fragment 가 들어갑니다.
그리고 BottomNavigationView 의 menu 는 아래와 같습니다.
<?xml version="1.0" encoding="utf-8"?>
<menu xmlns:android="http://schemas.android.com/apk/res/android"
    xmlns:app="http://schemas.android.com/apk/res-auto">
    <item
        android:id="@+id/first"
        app:showAsAction="ifRoom"
        android:enabled="true"
        android:icon="@drawable/ic_launcher_background"
        android:title="첫번째" />
    <item
        android:id="@+id/second"
        app:showAsAction="ifRoom"
        android:icon="@drawable/ic_launcher_background"
        android:title="두번째" />
    <item
        android:id="@+id/third"
        app:showAsAction="ifRoom"
        android:enabled="true"
        android:icon="@drawable/ic_launcher_background"
        android:title="세번째" />

</menu>
Fragment 를 3개를 생성해주세요. (스크린샷 생략)
각각 root layout 의 background 색상을 다르게 해서 Fragment 가 변경되었을 때 표시가 되도록합니다.
Activity 의 소스입니다.
class BottomNavTestActivity : AppCompatActivity() {
    private lateinit var binding: ActivityBottomNavTestBinding
    override fun onCreate(savedInstanceState: Bundle?) {
        super.onCreate(savedInstanceState)
        binding = ActivityBottomNavTestBinding.inflate(layoutInflater)
        setContentView(binding.root)

        changeFragment(LoginFragment())

        binding.bottomNavBottomNavView.setOnItemSelectedListener {
            when(it.itemId){
                R.id.first -> changeFragment(LoginFragment())
                R.id.second -> changeFragment(LogoutFragment())
                R.id.third -> changeFragment(ThirdFragment())
                else -> {}
            }
            true
        }
    }

    private fun changeFragment(fragment: Fragment) {
        supportFragmentManager
            .beginTransaction()
            .replace(binding.bottomNavFrameLayout.id, fragment)
            .commit()
    }
}
BottomNavigationView 의 아이템을 클릭했을 때의 이벤트 설정
binding.bottomNavBottomNavView.setOnItemSelectedListener {
    when(it.itemId){
        R.id.first -> changeFragment(LoginFragment())
        R.id.second -> changeFragment(LogoutFragment())
        R.id.third -> changeFragment(ThirdFragment())
        else -> {}
    }
    true
}
728x90
반응형
'Android' 카테고리의 다른 글
| [Kotlin] svg, png 추가하고 사용하기 (0) | 2023.08.01 |
|---|---|
| [Kotlin] Class 생성자 (0) | 2023.08.01 |
| [Kotlin] FrameLayout 사용해서 Fragment 써보기 (0) | 2023.07.28 |
| [Kotlin] Activity 에서 Fragment 변경하기 (0) | 2023.07.28 |
| [Kotlin] Fragment 에서 상위 Activity Method 호출하기 (0) | 2023.07.28 |


댓글