OpenCV for android
OpenCV4 api for android
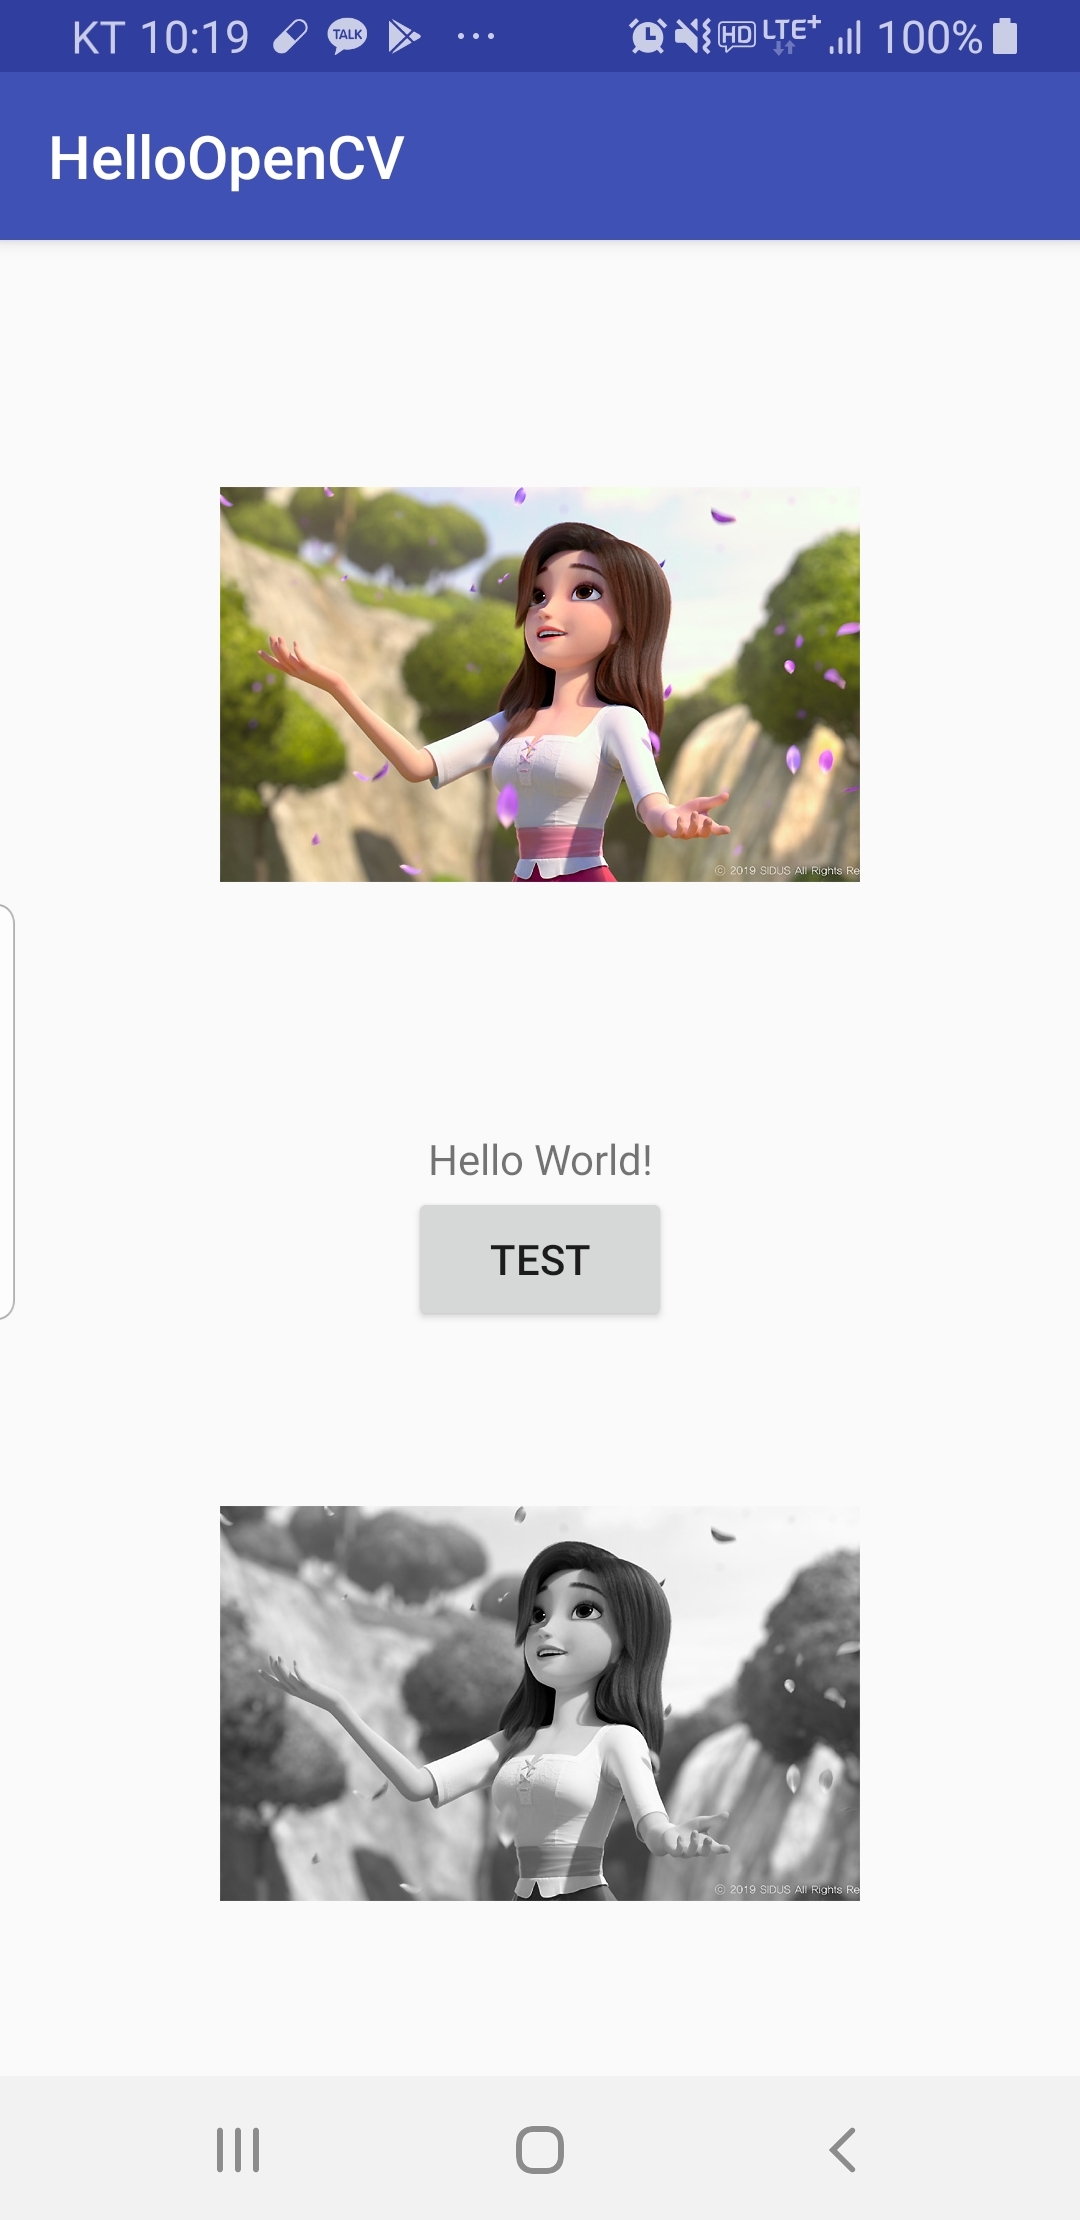
Assets folder 의 이미지를 GrayScale 이미지로 변환

일단 안드로이드 프로젝트를 생성하고 OpenCV 모듈을 Import 합니다.
2019/09/12 - [Android] - [Android] OpenCV4 for android (OpenCV4.1.1) 사용하기
[Android] OpenCV4 for android (OpenCV4.1.1) 사용하기
OpenCV 4.1.1 for AndroidAndroid opencv API Android Studio 에서 OpenCV 를 사용하도록 해보겠습니다. 일단 OpenCV 부터 다운로드 받아야겠죠. 아래 링크로 이동해서 다운받습니다. https://opencv.org/ OpenCV..
hello-bryan.tistory.com
MainActivity 에 테스트를 해보겠습니다.
일단 Layout 에 Button 과 ImageView 두개를 생성합니다.
activity_main.xml
<?xml version="1.0" encoding="utf-8"?>
<android.support.constraint.ConstraintLayout xmlns:android="http://schemas.android.com/apk/res/android"
    xmlns:app="http://schemas.android.com/apk/res-auto"
    xmlns:tools="http://schemas.android.com/tools"
    android:layout_width="match_parent"
    android:layout_height="match_parent"
    tools:context=".MainActivity">

    <TextView
        android:id="@+id/textView"
        android:layout_width="wrap_content"
        android:layout_height="wrap_content"
        android:text="Hello World!"
        app:layout_constraintBottom_toBottomOf="parent"
        app:layout_constraintLeft_toLeftOf="parent"
        app:layout_constraintRight_toRightOf="parent"
        app:layout_constraintTop_toTopOf="parent" />

    <Button
        android:id="@+id/button"
        android:layout_width="wrap_content"
        android:layout_height="wrap_content"
        android:text="test"
        app:layout_constraintEnd_toEndOf="parent"
        app:layout_constraintStart_toStartOf="parent"
        app:layout_constraintTop_toBottomOf="@+id/textView" />

    <ImageView
        android:id="@+id/imageView"
        android:layout_width="wrap_content"
        android:layout_height="wrap_content"
        app:layout_constraintBottom_toTopOf="@+id/textView"
        app:layout_constraintEnd_toEndOf="parent"
        app:layout_constraintStart_toStartOf="parent"
        app:layout_constraintTop_toTopOf="parent"
        tools:srcCompat="@tools:sample/avatars[0]" />

    <ImageView
        android:id="@+id/imageView2"
        android:layout_width="wrap_content"
        android:layout_height="wrap_content"
        app:layout_constraintBottom_toBottomOf="parent"
        app:layout_constraintEnd_toEndOf="parent"
        app:layout_constraintStart_toStartOf="parent"
        app:layout_constraintTop_toBottomOf="@+id/button"
        app:srcCompat="@drawable/ic_launcher_background"
        tools:srcCompat="@tools:sample/avatars[10]" />

</android.support.constraint.ConstraintLayout>
MainActivity.java 에서 OpenCV 를 사용하기 위해 Module Load 하는 소스를 추가합니다.
전역변수로 추가.
    // LoaderCallback
    private BaseLoaderCallback mLoaderCallback = new BaseLoaderCallback(this) {
        @Override
        public void onManagerConnected(int status) {
            switch (status) {
                case LoaderCallbackInterface.SUCCESS:
                    Log.i(TAG, "OpenCV loaded successfully");
                    break;
                default:
                    super.onManagerConnected(status);
                break;
            }
        }
    };
@OnResume 에 추가
    @Override
    public void onResume()
    {
        super.onResume();

        // OpenCV load
        if (!OpenCVLoader.initDebug()) {
            Log.d(TAG, "Internal OpenCV library not found. Using OpenCV Manager for initialization");
            OpenCVLoader.initAsync(OpenCVLoader.OPENCV_VERSION, this, mLoaderCallback);
        } else {
            Log.d(TAG, "OpenCV library found inside package. Using it!");
            mLoaderCallback.onManagerConnected(LoaderCallbackInterface.SUCCESS);
            isOpenCvLoaded = true;
        }
    }
버튼과 이미지뷰, GrayScale 로 변환하는 소스
        final ImageView imageView = findViewById(R.id.imageView);
        final ImageView imageView2 = findViewById(R.id.imageView2);

        Button button = findViewById(R.id.button);
        button.setOnClickListener(new View.OnClickListener() {
            @Override
            public void onClick(View view) {
                if( !isOpenCvLoaded )
                    return;

                try {
                    InputStream is = getAssets().open("redshoes.jpg");
                    Bitmap bitmap = BitmapFactory.decodeStream(is);
                    imageView.setImageBitmap(bitmap);

                    Mat gray = new Mat();
                    Utils.bitmapToMat(bitmap, gray);

                    Imgproc.cvtColor(gray, gray, Imgproc.COLOR_RGBA2GRAY);

                    Bitmap grayBitmap = Bitmap.createBitmap(gray.cols(), gray.rows(), null);
                    // 윗 부분 오류발생하면 마지막 param null 대신 Bitmap.Config.ARGB_8888
                    Utils.matToBitmap(gray, grayBitmap);

                    imageView2.setImageBitmap(grayBitmap);

                } catch (IOException e) {
                    e.printStackTrace();
                }
            }
        });
Assets Folder 에 redshoes.jpg 라는 이미지가 있어야 겠죠.
Assets Folder 생성해서 이미지파일 넣는 법
2019/09/12 - [Android] - [Android] Assets folder 만들기
전체 MainActivity.java
package opencvtest.bryan.hello.com.helloopencv;

import android.graphics.Bitmap;
import android.graphics.BitmapFactory;
import android.support.v7.app.AppCompatActivity;
import android.os.Bundle;
import android.util.Log;
import android.view.View;
import android.widget.Button;
import android.widget.ImageView;

import org.opencv.android.BaseLoaderCallback;
import org.opencv.android.LoaderCallbackInterface;
import org.opencv.android.OpenCVLoader;
import org.opencv.android.Utils;
import org.opencv.core.Mat;
import org.opencv.imgproc.Imgproc;

import java.io.IOException;
import java.io.InputStream;

public class MainActivity extends AppCompatActivity {

    private final static String TAG = MainActivity.class.getClass().getSimpleName();
    private boolean isOpenCvLoaded = false;

    @Override
    protected void onCreate(Bundle savedInstanceState) {
        super.onCreate(savedInstanceState);
        setContentView(R.layout.activity_main);

        final ImageView imageView = findViewById(R.id.imageView);
        final ImageView imageView2 = findViewById(R.id.imageView2);

        Button button = findViewById(R.id.button);
        button.setOnClickListener(new View.OnClickListener() {
            @Override
            public void onClick(View view) {
                if( !isOpenCvLoaded )
                    return;

                try {
                    InputStream is = getAssets().open("redshoes.jpg");
                    Bitmap bitmap = BitmapFactory.decodeStream(is);
                    imageView.setImageBitmap(bitmap);

                    Mat gray = new Mat();
                    Utils.bitmapToMat(bitmap, gray);

                    Imgproc.cvtColor(gray, gray, Imgproc.COLOR_RGBA2GRAY);

                    Bitmap grayBitmap = Bitmap.createBitmap(gray.cols(), gray.rows(), null);
                    Utils.matToBitmap(gray, grayBitmap);

                    imageView2.setImageBitmap(grayBitmap);

                } catch (IOException e) {
                    e.printStackTrace();
                }
            }
        });
    }

    private BaseLoaderCallback mLoaderCallback = new BaseLoaderCallback(this) {
        @Override
        public void onManagerConnected(int status) {
            switch (status) {
                case LoaderCallbackInterface.SUCCESS:
                    Log.i(TAG, "OpenCV loaded successfully");
                    break;
                default:
                    super.onManagerConnected(status);
                    break;
            }
        }
    };

    @Override
    public void onResume()
    {
        super.onResume();
        if (!OpenCVLoader.initDebug()) {
            Log.d(TAG, "Internal OpenCV library not found. Using OpenCV Manager for initialization");
            OpenCVLoader.initAsync(OpenCVLoader.OPENCV_VERSION, this, mLoaderCallback);
        } else {
            Log.d(TAG, "OpenCV library found inside package. Using it!");
            mLoaderCallback.onManagerConnected(LoaderCallbackInterface.SUCCESS);
            isOpenCvLoaded = true;
        }
    }
}
결과는 포스트 상단에 이미지가 있습니다.
전체 소스는 여기에.
https://github.com/hello-bryan/HelloOpenCV
hello-bryan/HelloOpenCV
Contribute to hello-bryan/HelloOpenCV development by creating an account on GitHub.
github.com
1초에 로또 15장 이상 당첨확인!
글 작성자의 안드로이드 앱 -> Google play
로또버스 LOTTO BUS - Google Play 앱
1. 멀티스캔 당첨확인 GPU를 이용한 인공지능 당첨확인 기존 앱들과 비교할 수 없는 속도 ! 멀티스캔으로 가장 빠르게. 2. 당첨이력을 분석한 추천 번호 생성이 무료 Oracle Cloud에서 매주 Python 통계/분석. 마음에 드는 분석기능을 선택하여 번호생성. 분석 가중치에 따른 번호 추출. 3. 심플한 내 번호 관리 꿈에서 본 그 번호! 바로 저장하세요. 스캔했던 로또 번호가 이력에 자동 저장
play.google.com
'Android' 카테고리의 다른 글
| [Android] Sound Play 사운드 재생 (0) | 2019.11.24 |
|---|---|
| [Android] 안드로이드 ttf font 적용 (0) | 2019.11.24 |
| [Android] OpenCV4 for android (OpenCV4.1.1) 사용하기 (2) | 2019.09.12 |
| [Android] Assets folder 만들기 (0) | 2019.09.12 |
| [Android] Bitmap Compress (압축) (2) | 2019.09.06 |


댓글